Оценить:
 Рейтинг: 0

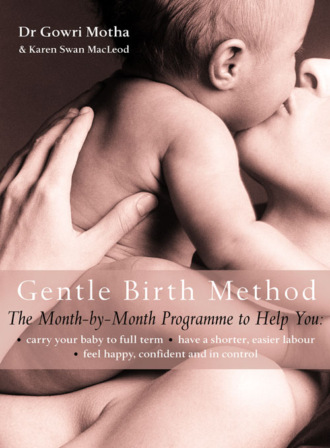
The Gentle Birth Method: The Month-by-Month Jeyarani Way Programme

Год написания книги
2018
<< 1 ... 8 9 10 11 12 13 >>
На страницу:
12 из 13
Настройки чтения
Размер шрифта
Высота строк
Поля

This covers the neck area from the occiput (the base of the skull) down over the shoulder blade area to the area where a bra line would be.

Normalizing temperature

Using the back of your hand, sweep across the back and neck to identify ‘hot spots’ (or areas of congestion). When you find them, cup your hand and use the ‘cooling breeze’ to reduce the temperature in those areas (as described on page 54).

Opening drainage channels (alternate with Removing Congestion (see below)) To drain the lymph down the sides of the neck, use your three middle fingers. Place the three central fingers together with the middle finger slightly behind the other two, to create a ‘trough’. The three fingers are then used to make downward sweeping movements from behind the ear, close to the bony prominence (the mastoid bone) down towards the base of the neck. On every third or fourth stroke, make longer sweeps that continue across the top of the shoulder. Start on either side of the neck and after about 12 or so sweeps, do the other side. Use your right hand to treat the right side of the mother’s neck and the left hand to do the left side.

Identify the triangular clavicle space or hollow (called the supraclavicular fossa) created by the lines of the collarbone and the outer margin of the trapezius (or neck muscles). Within this area are lots of important structures such as blood vessels, nerve plexuses and lymphatics. The main lymph drainage channel is called the thoracic duct. This collects lymph all the way up from the feet to the chest. It traverses the triangular space above the clavicle and drains into the subclavian veins within the neck area. This massage will ensure good drainage so that toxins from the whole body are carried away.

Removing congestion and clearing the primary lymphatic filter area in front of the neck

Using the tips of the index, middle and ring fingers, make small, light circular rotations across this space, covering the edges too. Imagine your fingertips are searching for grains of sand in the tissue just beneath the skin surface. This can be done for a minute at a time, alternating with the drainage movement down the sides of the neck (above) – one side at a time. It is very important to use a light touch for this technique – it should be gentler than when working on muscle.

For further drainage of toxins, cup your hands with the thumbs closed next to the fingers and create a slightly cupped shape with the palms of your hands. Place them on either side of the spine on the lowest part of the ribs. Now move your cupped hands up the back using small circular movements. You want the movement of your hands to be like a caterpillar (I actually call this movement the ‘cupped caterpillar’), so you will find that as you move your hand the middle part of it will move closer and then further away from the back. During this treatment your intention is to create a vacuum and drain all the toxins over the shoulders into the triangular supraclavicular space in front of the neck.

To complete, once again clear the triangular space above the clavicle using little circular movements with your fingers as you have done previously.

If the shoulders feel tense you can alternate the cupped caterpillar movement with a feathering movement (small short circular strokes with the thumb, moving up the back) to help loosen tense muscles. The thumbs work across the muscles between the shoulder blades and spine, just gently teasing out the muscles (this can be done during the birth too, to help keep the mother relaxed and loose).

Loosening the neck muscles downwards

The final part of treating the upper back and shoulders includes the loosening up and downward drainage of the muscles directly at the back of the neck at the midline, from the occiput (base of the skull), down to the last cervical vertebrae. Often these muscles feel like two solid columns due to muscle tension and the most efficient way of loosening these neck muscles is to work downwards in little circular movements using gentle but firm pressure of the thumb and forefinger of your right hand. These movements should be followed by draining straight down the vertical columns of muscle, with longitudinal strokes, using the same fingers. Alternate between the circular and straight-down movements. Finish by draining the toxins that you have released from the neck by using the cupped caterpillar movement from between the shoulder blades, up over the shoulders into the triangular (supraclavicular) spaces in front of the neck (as done earlier).

II) The middle back

This covers the area below the lowest part of the shoulder blades (around where the bra line would be) to the iliac crest (the rise of the hips).

Encouraging drainage

Cup the hands and make gentle, downward flowing strokes across the kidney area. As the hands approach the iliac crest, let them glide over the hips and travel under the bump, towards the pubic joint (below the front of the belly). This movement helps to encourage kidney drainage and pushes excess tissue fluid toward the lymphatic channels in the groin. Perform these movements for about 3-5 minutes.

III) The sacrum

Here you will be working on the sacrum and loosening up the sacro-iliac joints and the ligaments in that area. The sacrum is the upside-down triangle below the last vertebra.

Breaking down congestion

Locate the two ‘dimples’ of the sacrum with the thumbs. (If the dimples are not visible, place your hands on the top of the mother’s hips and where the thumbs rest will be the approximate position of these dimples.) Make small upward and outward rotating movements with the thumbs in this area. It may feel quite nodular or lumpy so do check if the pressure is comfortable. Often the sensation is quite pleasant for the recipient, although the area may be tender. These movements help to make the sacrum more flexible, meaning it will open more effectively during the birth. It also helps the emptying reflex of the colon.

This massage can also be performed during labour, for 7 minutes at a time, and has been found to help both the mother progress to second stage more quickly, and reduce the length of the second stage.

Removing congestion on the sacrum and the sacro-iliac joints

Place your thumbs, with the thumbs pointing horizontally at each other, at the bottom of the sacrum really low on the coccyx (tailbone) in between the buttocks. Spread your hands flat over the lowest part of the buttocks. Hook the thumbs under the tailbone, if possible, and roll up a fold of skin and underlying tissue towards the top of the sacrum and the last mobile joint of the spine. First do this movement directly upwards and then gradually fan your thumbs outwards until you are working along the V-shaped sacro-iliac ligaments. Perform this upward stroking movement for about 5 minutes, with the intention of removing congestion. (Please note: the sacrum should be massaged only in an upward direction.)

This movement helps to decongest and loosen the sacrum, helping the baby’s head to descend easily into the birthing space. It also increases the flexibility of the coccyx. Note: If this massage is performed regularly during the last few weeks of pregnancy, the baby’s head is encouraged to engage deeply in the pelvis at 36-38 weeks.

Every so often you should repeat the ‘dimples thumb massage’ for a minute or two.

Occasionally, using cupped hands, drain horizontally outwards across the buttocks from the sacro-iliac ligaments, around the hips and to the front of the pelvic area underneath the bump. These movements help to loosen up all the muscles within the buttocks and increases pelvic mobility. Do this horizontal massage for 2 minutes at a time.

Repeat the entire sequence of the above set of movements slowly over and over again until you get a sense of loosening (approximately 5 minutes).

As you become more practised at the method you may notice how the texture under the skin changes. If the skin seems puffy, it usually means that you need to work more often on breaking down congestion and drainage.

Please do the General Treatment massage of the neck and shoulders, upper back, middle back and sacrum as often as possible every week for about a total of 20 minutes. This assists the mother’s back and pelvis to easily stretch and allow the baby’s head to engage and be born through the inner diameters of the pelvis.

Back and Spine Treatment (Treatment for loosening back muscles, toning the back and back pain)

The Creative Healing back treatment is useful for treating back pain due to different causes. Even if there are no specific back problems this treatment strengthens the back and keeps it flexible, which is important for giving birth. The partner uses the tip of the thumb of each hand on either side of the spine to replace displaced substances in between the vertebral spaces. Most back pain is caused by the displacement of tissues: however, even if there is no displacement the back trouble can be helped by this remoulding movement.

The mother sits upright on a firm bench. Begin at the bottom of the spine, identify the lowest space between the sacrum and the last lumbar vertebrae – to find this ask the mother to rock gently forward and you will be able to identify the space between the sacrum and the last mobile vertebra of the spine. Place the tip of your right thumb horizontally in the soft space about an inch away from the mid-line on the right side of the spine. Feel your thumb gently sinking into this spot and with a light pressure rotate the thumb from a horizontal to a vertical position. Do not go beyond the vertical. Repeat the same movement in the same space on the other side of the spine using the left thumb. During the quarter twist of the thumb make sure that the thumb stays in the same spot. Once you have done this in the first space, move up the spine one space at a time, left hand following the right hand, until you reach the base of the neck. Work slowly with a healing intention. Once at the top of the spine use the palms of the hands stroking directly downwards, one following the other, straight down the middle 10 times. Repeat this remoulding using the thumbs as many times as you feel is necessary.

A valuable movement for remoulding the spine and loosening up tense columns of muscles on either side of the spine. The mother should sit up-right on a firm seat. [N.B. All back treatments are done sitting up as lying down will close the spaces between the vertebrae and it will not be possible to treat the spine effectively.] During this movement the thumbs are forming two blades of a pair of scissors, the rest of the fingers are stretched out and held together as units. The partner should start by placing the right thumb on the left side of the spine, with the tip of the thumb in the space between the sacrum and the last vertebra (fifth). The left thumb is placed above it on the right side of the spine in one space above the other thumb, so that the thumbs are crossing. The tips of each thumb form a pivot point. To perform the movement move the thumbs from the horizontal to vertical positions: if you think of your thumbs as two blades of pair of scissors, the scissors close. The thumbs in this way make a quarter turn in each space. Proceed in the same way up the entire spine to the base of the neck. Then begin again at the lowest part of the spine, this time with the left thumb in the higher position. These two upward movements are considered a ‘set’: perform 5-6 sets of these movements and then stroke downwards over the spine one palm following the other 10 times.

[Note: this movement loosens the back muscles and the vertebrae. I often describe this movement to my students as a bird flying up the spine.]

Abdominal Toning

Abdominal Toning intends to realign the energy lines within the whole of the abdominal cavity and create a sense of harmony and balance between the digestive organs and the pregnant uterus with the baby within. In my experience this has a very beneficial effect on placental circulation. On our programme we routinely apply abdominal toning to all mothers from the time that they book onto our programme. (Note: On occasion a mother has been referred to me for intra-uterine growth retardation with reduced amount of amniotic fluid, and performing abdominal toning for 10 minutes followed by specific nutritional advice has often restored the foetal growth rate and amniotic fluid levels to normal.)

Benefits

Oxygenates the baby

Encourages lymphatic drainage of the contents of the whole abdomen

Tones the uterine muscle and encourages placental circulation

Decongests the veins

Reduces swelling in the legs

Helps with digestive function and grants the mother a sense of ‘lightness’ within the abdomen

Technique

The mother lies on her back on a bed, or couch, propped up on pillows at a comfortable 45-degree angle. Olive oil is used as a lubricant. The outer borders of the abdominal area are identified by the rib cage on the top and the bikini line on the bottom.

Sit or stand comfortably on the right-hand side of the mother. Start with a cupped right hand with an open palm with the thumb out at right angles to the rest of the fingers. Place this hand on the left hand side of the abdomen at the bikini line and sweep upwards in a straight line towards the ribs. Follow the curve of the bump. Once the thumb crosses the margin of the rib cage allow the thumb to close against the other fingers.

Then break contact and start again at the bikini line having moved a bit towards the midline of the body. Continue with these movements in close parallel lines until the right hand side of the abdomen is reached.

Repeat this sequence from right to left and so on for 10 minutes. Cool the skin as you go along (taking the heat off with your cupped hands).

Pelvic Drainage

This helps to remove excess fluid accumulation in the inner pelvic area, especially around the base of the cervix and the uterus. This kind of water-logging often buoys up the baby’s head in the lower abdomen, delaying the baby’s head from engaging and resulting in a longer first stage of labour.
<< 1 ... 8 9 10 11 12 13 >>
На страницу:
12 из 13

Другие электронные книги автора Karen Swan MacLeod