Последний отзыв
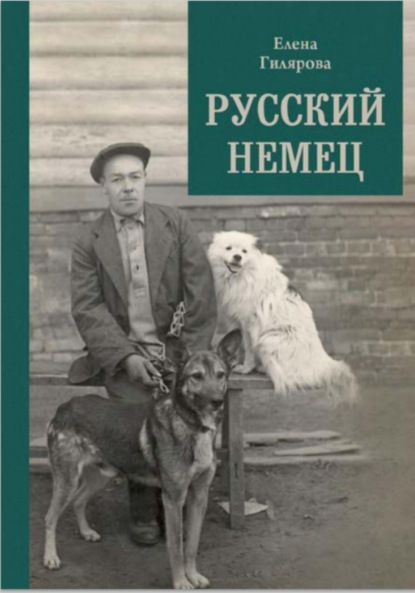
Русский немец

 3.5
3.5
Книга о трагической судьбе бывшего солдата германской армии, который остался в Советской России и в 1922 году женился на учительнице сельской школы. О...
Далее
По всем вопросам обращайтесь на: info@litportal.ru
(©) 2003-2024.
✖


Baking Made Easy
Настройки чтения
Размер шрифта
Высота строк
Поля
• For best results, do use the size of tin or dish recommended in the recipe.
• The best way to grease tins and pans is with the vegetable oil spray often used for low-fat frying.
• Bake cakes on the middle shelf of the oven at 180°C (350°F), Gas Mark 4 unless the recipe states otherwise. Bread should be baked in the top third of the oven, while meringues need to be put near the bottom. (For meringues, you can also leave the oven door open just a fraction, which allows moisture to escape.)
• Every oven is different, so cooking times can often vary. If opening the oven to check something’s cooked, open the door, take out the item and then close the oven again quickly so that the heat does not get lost.
• To test if a cake is cooked, insert a skewer or cocktail stick into the centre of the cake – it should come out clean.
Tips for great bread-making
• If you do it right, bread-making can be the easiest thing in the world. For the very best loaves, fresh yeast is the way forward. But after it proved a challenge to buy in central London, I thought it prudent to suggest fast-action dried yeast for the recipes in this book. I know many people might have a bread maker – indeed, I was the owner of one for a spell – but I missed the tactile and magical experience that comes with being able to see every stage of the bread-making process, and I’m now a firm believer in making it by hand.
• Be brave with the water: the wetter the dough, the fluffier and lighter the loaf will be.
• Always measure out the salt precisely, as this one ingredient makes all the difference between a good-tasting loaf and a bad one. And be warned that lo-salt, whilst brilliant for other dishes, does not work well when making bread, because it doesn’t impart enough flavour and the bread will end up tasting bland.
• Accurately time the kneading process and knead the dough for the full time stated in the recipe. It really does make a difference.
• When leaving the bread to rise, it likes to be in a warm but not hot place. Most airing cupboards and tops of radiators are too warm. A warm, cosy kitchen is usually just fine.
• To test if the bread has risen enough, flour your finger and gently prod the side of the loaf. When ready, the dough should spring halfway back up.
• Once a loaf is ready to bake, there are a number of ways to ‘glaze’ it. Milk will give it a soft, matt look; eggwash will give a shiny, crunchy look; and sieving a little flour over the top will give it an authentic rustic ‘French bread’ look.
• Try to create a steamy environment inside the oven – this will give the bread plenty of time to rise up before the hard crust starts to develop. Throw some ice cubes into the bottom of the oven, use a water spray to create a mist, or put a roasting tin, half filled with water, on the bottom shelf.
• If the top of your loaf is done but the bottom is not (to check, turn it over and tap it. If ready, it will sound hollow), cover the loaf loosely with some foil to prevent it from colouring further while it finishes cooking.
Chapter 1: Breads
If you’re lucky enough to live near a good patisserie or deli, you’ll know what an amazing array of breads they have on show. When I have time, I find great comfort in making my own bread, and whether you’re a novice or are well-practised in bread-making, there will be something for you here. Soda bread comes top for ease of making, while the fougasse needs slightly more effort and skill. Whichever recipes you choose, if you follow the instructions to the letter, you’ll end up with a loaf to be proud of.
‘Blues is to jazz what yeast is to bread. Without it, it’s flat.’
Carmen McRae
Jazz vocalist and pianist 1920 – 1994
Croissants
A humble breakfast pastry or the king of Parisian patisserie – how did the simple croissant become so famous? The homemade version is quite different to the ones widely available in supermarkets. Admittedly there is a high degree of fiddlyness required to create this most perfect of crescent-shaped delights (and let’s not dwell on the mountain of butter involved…). However, my recipe is speedier than other croissant recipes and the taste and texture are in sharp contrast to the soft, insipid variety you will have previously eaten. Makes 12–14
310g (11oz) strong white bread flour
165g (5½oz) plain flour, plus extra for dusting
2 tsp salt
60g (2½oz) soft light brown sugar
1 x 7g sachet of fast-action dried yeast
40g (1½oz) butter
250ml (9fl oz) water
230g (8¼ oz) block of butter, softened
Vegetable oil or oil spray, for oiling
1 egg, lightly beaten, for glazing
Put the flours, salt, sugar, yeast and 40g (1½oz) butter in a large bowl. Using your fingers, rub the butter into the mixture until it resembles fine breadcrumbs. Add the water and stir with a knife to bring the mixture together. Gently knead for less than a minute to a smooth ball. For croissants, unlike most bread, it is important that the dough is ‘worked’ as little as possible at this stage. Wrap it in clingfilm and leave in the fridge for 1 hour to rest.
Once the dough has been ‘rested’, roll it out on a well-floured surface to a rectangle no larger than 20 x 20cm (8 x 8in). Place the block of softened butter in the middle of the dough. The butter needs to be the same softness as the dough. Fold up the edges of the dough over the top so they overlap and completely cover the butter.
This next process is called rolling and folding, or ‘turns’, and it creates the characteristic flaky layers of a croissant. Keep the work surface well floured so the dough does not stick. Roll out the dough to a rectangle 3 times as long as it is wide, about 45 x 15cm (17¾ x 6in). Make sure it is rolled uniformly so the butter is spread out evenly inside.
Place the dough with the shortest end facing you. As if you were about to step out on a red carpet. Take the end nearest you and fold it into the centre. Then fold the top third down so the two ends now meet in the middle. Turn the dough 90° to the left and then repeat this step. Wrap the dough in clingfilm and put in the fridge for an hour to rest. You have now given the dough two ‘rolls and folds’.
Remove the dough from the fridge and give the dough one more ‘roll and fold’ by rolling it out to 45 x 15cm (17¾ x 6in) again and folding the ends into the middle as before. Then roll it out to a rectangle about 35 x 14cm (14 x 5½in). Place the dough on the baking tray, cover with oiled clingfilm and leave to rest in the fridge for 1 hour.
Put the dough on a lightly floured work surface and trim any ragged edges with a sharp knife, then cut the dough in half lengthways. Cut each strip into triangles, each with a base of about 6cm (2½in) and two longer sides, 8.5 x 8.5cm (31/3 x 31/3in), going up to the point. You may have some trimmings left over. Place each triangle on the work surface with the longer point towards you and roll up the triangle away from you so that the tip folds over the top. Place them all on the baking tray and carefully curve into crescent shapes. Make sure the croissants are spaced well apart to allow them to expand during cooking. Cover with oiled clingfilm and leave to rise in a warm place for 1 hour.
Preheat the oven to 200°C (400°F), Gas Mark 6.
Brush the croissants lightly with the lightly beaten egg and bake in the oven for 15 minutes, or until golden brown. Remove from the oven and leave to cool on a wire rack.
Mascarpone & brown sugar
Scones
The unusual use of mascarpone and light brown sugar in this recipe makes these scones extra rich and a cut above the regular type. Makes 9
340g (12oz) self-raising flour, plus extra for dusting
1 tsp baking powder
Pinch of salt
80g (3oz) butter, cold and cubed
2 tbsp soft light brown sugar
80g (3oz) mascarpone
About 90ml (3fl oz) milk
Другие электронные книги автора Lorraine Pascale
Последний отзыв
Русский немец
3.5
Книга о трагической судьбе бывшего солдата германской армии, который остался в Советской России и в 1922 году женился на учительнице сельской школы. О...
Далее