Последний отзыв
Книгу прочитать не могу, везде ЛитРес свой нос сунул, как и где скачать полную версию бесплатно!?!?
По всем вопросам обращайтесь на: info@litportal.ru
(©) 2003-2024.
✖


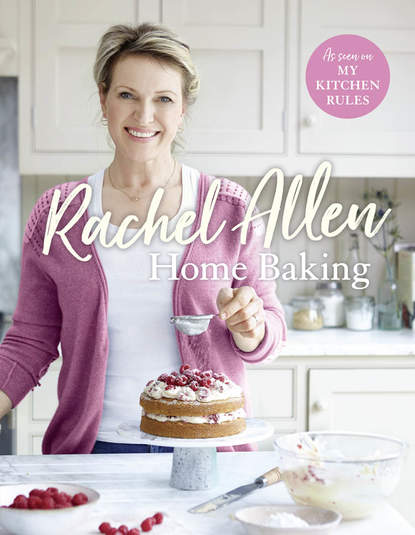
Home Baking
Настройки чтения
Размер шрифта
Высота строк
Поля
150g (5½oz) butter, cut into cubes
50g (1¾oz) honey
For the decoration
2 tbsp toasted hazelnuts (#litres_trial_promo), coarsely chopped
1 generous tsp honey
two 18cm (7in) sandwich tins
1. Preheat the oven to 180°C (350°F) Gas mark 4. Grease the sides of the tins, and line the bases with baking parchment. Put the chocolate and butter in a heatproof bowl over a saucepan of water, making sure the base of the bowl doesn’t touch the water. Put over a medium heat and bring the water to the boil, then immediately remove the pan from the heat. Leave the mixture to melt slowly, stirring regularly.
2. Once melted (and the mixture is not hot), stir in the honey. Beat the egg yolks into the chocolate mixture.
3. Put the hazelnuts in a food processor and whizz until still a bit gritty. Add to the chocolate mixture. Put the egg whites into a clean, grease-free bowl, add a pinch of salt and whisk with an electric beater until they form stiff peaks, or use a food processor.
4. Fold the egg whites into the chocolate mixture in two halves, then divide between the two prepared tins and bake for 20 minutes or until a skewer inserted into the centre comes out clean. Leave to cool in the tins on a wire rack for 5 minutes. Run a knife around the edge and remove the cakes from the tins. Leave to cool on a wire rack, then remove the paper.
5. Meanwhile, make the glaze. Put the chocolate in a heatproof bowl over a saucepan of water, as before. Put over a medium heat and bring the water to the boil, then immediately remove the pan from the heat. Leave the chocolate to melt slowly, stirring regularly. Once melted, add the butter, a few pieces at a time, until it has all been mixed in and melted. Stir in the honey and place the bowl with the glaze in the fridge, stirring every 5–10 minutes and scraping down the sides of the bowl.
6. When the glaze has thickened, put one of the cakes upside down on a cake stand or plate. (You can use a plate turned upside down, which is quite convenient for icing the sides of the cake.)
7. Put some of the glaze on the top of the cake on the plate to cover it. Put the second cake on the first and then tip all the remaining glaze on top and, using a palette knife, spread it to cover the sides and top of the cake. To decorate the cake, scatter the toasted hazelnuts over the top and drizzle with the teaspoon of honey. Serve.
Triple Chocolate celebration cake (#ulink_db078e86-85ff-58ec-976c-31f1ba174c23)
Developed by my friend Pamela Black, this is a cake that doesn’t need too much of an introduction – the title says it all! It’s a guaranteed crowd-pleaser.
Serves 10–12
350g (12oz) butter, softened, plus extra for greasing
350g (12oz) caster sugar
6 eggs
350g (12oz) plain flour
2 tsp baking powder
40g (1½oz) cocoa powder
40g (1½oz) drinking chocolate
200g (7oz) natural yoghurt
110g (3¾oz) dark chocolate (55–62% cocoa solids), roughly chopped
gold leaf or icing sugar, to decorate
For the white chocolate buttercream filling
110g (3¾oz) white chocolate (melted and cooled)
225g (8oz) butter, softened
450g (1lb) icing sugar
For the chocolate glacé icing
110g (3¾oz) icing sugar
50g (1¾oz) cocoa powder
15g (½oz) butter
½ tsp vanilla extract
four 18cm (7in) sandwich tins; baking sheet
1. Preheat the oven to 180°C (350°F) Gas mark 4. Grease the base and sides of the tins, and dust lightly with flour. Put the butter in a large bowl and cream it with a wooden spoon until soft, or use an electric beater on slow or a food processor. Add the sugar and beat until light and fluffy.
2. Add the eggs, one at a time, adding 1 tablespoon flour each time and beating well after each addition. Sift the remaining flour, the baking powder, cocoa and drinking chocolate together in a bowl. Gradually fold into the egg mixture to combine. Finally, fold in the yoghurt.
3. Divide between the prepared tins. Bake for 20–25 minutes until firm to the touch. Leave to cool in the tins on a wire rack for 5 minutes, then turn out and leave on the rack to cool completely.
4. Meanwhile, make chocolate curls for the topping. Melt the chocolate in a heatproof bowl over a pan of gently simmering water, making sure the base of the bowl doesn’t touch the water, and stirring regularly. Spread thinly over the back of a baking sheet and leave it to cool in the fridge until firm but not fridge-hard.
5. Hold a long, sharp knife at the top of the baking sheet and tilt it at an angle towards you with one hand on the handle and the other at the top of the blade. Very carefully pull the knife towards you, scraping the chocolate as you go. Curls should start to peel up from the sheet. If it crumbles, the chocolate is too cold, and if it goes gooey, it’s too warm. Keep scraping down, returning the sheet to the fridge for a few minutes if it gets too warm, until you have shaved all the chocolate and collected enough curls for the top of the cake. Leave somewhere cool until needed. (They can be made a few days in advance.)
6. To make the buttercream filling, melt the chocolate in a heatproof bowl over a pan of gently simmering water, making sure the base of the bowl doesn’t touch the water, and stirring regularly. Leave to cool.
7. Put the butter in a large bowl and cream it with a wooden spoon until light and fluffy, or use an electric beater on slow or a food processor. Sift in the icing sugar, beat well, then add 2 tablespoons hot water. Gently fold in the cooled melted white chocolate.
8. To make the icing, sift the icing sugar and cocoa powder into a bowl. Heat the butter, vanilla extract and 3 tablespoons water in a saucepan over a medium heat until just at boiling point. Pour into the icing sugar and cocoa, then beat well using a wooden spoon. The icing should be the consistency of fresh double cream; if it is too thick, add a little more warm water, then cool slightly before using.
9. Spread three cakes with half the white chocolate filling and then stack them together on an icing turntable. Put the remaining cake on top and carefully spread the top and sides with the remaining buttercream. Chill in the fridge for at least 1 hour until firm.
10. Gently pour the chocolate glacé icing over the top of the cake, allowing it to drizzle slightly and unevenly down the sides. Leave to set before piling the chocolate curls on top. Decorate with a little gold leaf for total decadence or dust the chocolate curls with icing sugar.
Chocolate pain d’épices (#ulink_88a258c8-e2e0-5882-813f-e485051d6dce)
This cake is not overly sweet but it has an intriguing spice combination. It’s worth splashing out on a really good high-cocoa chocolate bar that will add to the layers of wonderful flavours and aromas.
Serves 8
125g (4½oz) butter, plus extra for greasing
Другие электронные книги автора Rachel Allen


Последний отзыв
Книгу прочитать не могу, везде ЛитРес свой нос сунул, как и где скачать полную версию бесплатно!?!?