Последний отзыв

Да, первый рассказ из сборника, что я успела прочитать, что надо! И написано хорошо, и содержание необычное, но жизненное. Очень понравилось, хотя там...
Далее
По всем вопросам обращайтесь на: info@litportal.ru
(©) 2003-2024.
✖


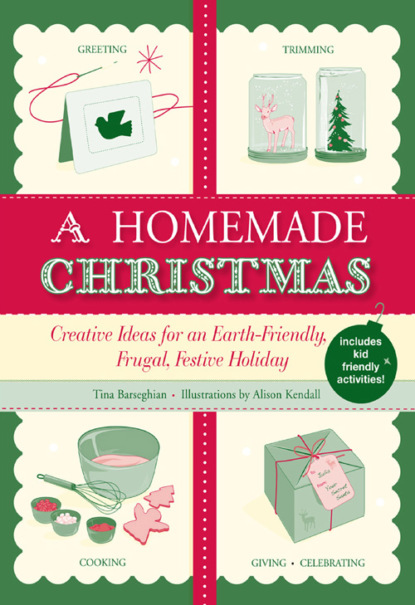
A Homemade Christmas
Автор
Год написания книги
2018
Настройки чтения
Размер шрифта
Высота строк
Поля
Seeing the images online is fun, but it doesn’t give the same satisfaction as holding an actual printed photograph in your hand. There’s the delicious anticipation upon spotting the envelope in your mailbox, followed by the thrill of opening it and seeing the photo for the first time: the children’s goofy smiles, the pet’s hilarious outfit, your friend sipping a margarita in Mexico. Stick it on the fridge, and you’ve got an instant reminder of someone you love that can make you smile on a daily basis.
Take the time to turn a simple photo card into a special holiday greeting. Here are two easy options:
If your Christmas greeting list is long: Use an online photo site to create unique cards that you can personalize with a special note or decorative embellishment. Just choose the photo(s), upload them to the website (see Resources), and select a design for the card. You’ll find every imaginable theme and variation in color, number, and arrangement of photos; background design elements; and greeting copy. A week later, you’ve got 50 to 500 photo cards in your mailbox, ready to write in and send out!
If your list is short (or you have more time): Get simple, nice quality, blank cards, then attach your photo using photo backing adhesive or photo corners (both available at most art supply stores). You can also find blank cards that already have four slots cut into the cover for a standard-size photo, or layered cards into which you can slide your image, which then shows through a “frame” cut out of the front.
Make a Holiday Stamp
A stamped card makes an artful and unique handmade greeting. The best part about using a stamp for Christmas cards is that you do the labor-intensive part just once—the rest is simple stamping.
You can choose to go with the elegance of a single image or a mash-up of multiple designs. Experiment with different colored inks, or add color with markers, pencils, or paints to get the design just as you imagined it.
Potato stamp: Cut a potato in half, draw or trace your design onto the flat surface, then carve out the outline with a paring knife or carving tool to cut around the image.
Simple foam stamp: Use a Christmas-themed cookie cutter to cut out a design from a piece of foam. You may need to use scissors to clean up the edges. Glue the foam onto a block of wood, and after it’s dry, it’s ready to be used as a stamp.
Lino-block stamp: You can take it up a notch and create your own linoleum-block stamp (which, by the way, can be reused—and for different purposes). Draw your design onto a piece of linoleum block, which can be purchased online or at any art supply store. From here, you can either carve out around the outline of the design, as with the potato stamp, or carve deeply into the block itself. Then, using either paint or an ink pad, press the design onto your card. Carving the outline will result in just the carved shape appearing on your card, while carving into the stamp will cover your entire card with color. You decide what look you want to achieve.
Those who can’t imagine carving out a stamp of any type will be happy to know that every imaginable design is available at craft shops and online stamp purveyors. You’ll find all manner of Christmas trees, angels, reindeer, snowmen, snowflakes, Santas, holly, bells, and much more.
Stitch Up a Greeting
Use simple needlework to make an exquisite and unique holiday card.
For those with even the most rudimentary sewing skills, making a hand-embroidered or machine-sewn card is a cool, crafty alternative to the standard holiday greeting. Think of the surprised smile of the recipient who opens this card.
All you need to get started is a blank card made out of heavy paper or cardstock, an embroidery needle, embroidery floss, and a little imagination.
1. Draw your design on the front of a blank card. A star is simple yet festive; if you’re feeling artistic, try a snowman, reindeer, or the words “Merry Christmas!”
2. Choose the color of your embroidery floss and decide if you’re going to use the same color on the entire design or different spots of color in different places.
3. Thread your embroidery needle with the floss. If you’re a beginner, use a straight running stitch to begin sewing along the drawn lines: the simpler the stitch, the cleaner it will look. If you’re confident of your stitching ability, try other stitches, such as whip stitch, stem stitch (#litres_trial_promo), chain stitch, or cross stitch. You may even want to have some French knots scattered across the card to look like tiny stars or snowflakes.
4. When you’re done stitching, use tape to secure the end of the thread to the back of the card.
For the more advanced sewer, slip the card underneath the sewing machine, and sew over your drawn design. Just make sure your needle is strong enough to sew on heavy paper or cardstock.
Don’t be intimidated by the amount of time it’ll take to make all of your cards. While keeping your hands busy with the embroidery, catch up on your favorite television series or listen to an audiobook.
Fashion a Felt Card
Felt is a fabulous choice for a holiday card—its warm texture, bold colors, and three-dimensionality are guaranteed to give any card project a tactile appeal.
Easy to use for all ages, felt is a versatile material that is inexpensive, cuts easily, does not fray or tatter, and adheres to cardstock or paper with liquid craft glue. Enhance an existing card design with felt or use a blank card to make an original work of art. Here are a few suggestions to get you started.
Geometric pieces card: Cut pieces of felt in basic geometric shapes and combine them into recognizable forms, such as a Christmas tree (one large triangle or three triangles of increasing size), ornaments (small circles), a house (triangle and square), presents (small squares and rectangles), a Santa hat (triangle and a circle), a snowman (three circles of increasing size), and holly (a long, thin rectangle and circles). Glue them to your card, and you’re done. The possibilities are endless!
Simple reverse cut-out card: Draw animal shapes, stars, angels, or snowmen onto the felt; use a sharp blade to cut the figures out. Glue the felt outline to a card, and your design will be revealed in reverse.
Felt postcard: Cut out a piece of felt and a piece of cardboard, both in the size of a postcard—4¼ by 6 inches (10.5 x 15 cm). Glue them together and trim the edges so that they match. Create your design on the front, and write your holiday greeting on the back. Add a stamp and send it off in the mail as a postcard. (Do make sure the glue is dry and the felt and stamp are securely adhered to the cardboard.)
All of these ideas can also be applied to making ornaments. Just punch a hole at the top of your design and thread it with a pretty ribbon.
Reuse Paint Color Chips
Create unique cards that are also eco-friendly.
Next time you come home from the hardware store with a fistful of paint samples, consider using them for a different type of project: your Christmas cards. The progressively deepening hues of color make a beautiful backdrop or pattern that can be used a number of different ways. The variations are endless, so adapt these ideas as you see fit; the idea is to take advantage of the sturdy, colorful paper in clever ways.
You can glue the entire piece onto blank cards and decorate each square, either with words (“Merry Christmas & Happy New Year!”), stickers, or, if you’ve got the time and inclination, cut and paste photos of you and your family, giving the card the appearance of a photo booth picture set.
Cut the wider paint chip samples into triangular Christmas tree shapes, stars, and snowmen (three circles on top of each other), and then embellish with stickers, glitter, or shapes cut from other paint chips.
If you’re adept at drawing, sketch the silhouette of a tree branch and cardinal, or other Christmas icon.
You can also use paint chips as gift tags, garlands, nametags for place settings, or tree ornaments.
Construct a Pop-Up Card
Surprise your friends and family with a pop-up greeting.
A pop-up card lends itself well to any design you’d like to use: a snowman, a Christmas tree, a snowflake, a star, a dove—or words like “Noel” or “Peace.” It’s also a great way to showcase your favorite family photo.
To get started, you’ll need either a blank folding card or an 8- by 10-inch (20 x 25 cm) piece of cardstock folded horizontally.
1. From the outside crease of the folded card, cut two short (about 1½ or 2 inch; 3.5 or 5 cm) parallel lines about ½ inch (1 cm) apart from each other, equidistant from the center of the card.
2. With your card open to an L shape, gently push in the slice you’ve just cut, so it pops forward (away from the crease). This will create the support for your image.
3. Cut a design (tree, star, snowflake, photo) from cardstock or heavy paper. Use a glue stick to apply glue to the pop-out support, then adhere your design to the backing and press the card closed so it dries securely.
You can also use multiple images on the same card by cutting out two or three slots instead of one.
Collage a Card
Recycle magazines and catalogs to make cut-and-paste Christmas cards.
Magazine editors spend months finding and curating the perfect holiday images for home design, lifestyle, and fashion magazines, and even those mail-order catalogs that are heaped into your mailbox by the pound. Rather than tossing them into the recycling bin, why not use them to create your own pieces of original art?
Using standard scissors (or pinking shears, for a more decorative edge) cut out images that you like: Christmas trees, holly, candles, fire, snowy scenes, or anything that conveys the holiday spirit. Then decide on a visual theme to organize the images. Collect some blank cards, glue, and any embellishments (such as ribbon or glitter) you think would look nice, and you’re ready to start. Here are some suggestions.
Cut circles or onion shapes from the pages. Glue them on to the card and draw a line from the top of the shape to the top of the card to make them look like ornaments.
Cut out a square from a glossy, colorful page and glue rickrack ribbon around its outside edges to make it look like a present.
Cut out key words like “Celebrate” or “Noel” and paste them onto the card—try a vertical or diagonal orientation for a fresh look.
Последний отзыв
Да, первый рассказ из сборника, что я успела прочитать, что надо! И написано хорошо, и содержание необычное, но жизненное. Очень понравилось, хотя там...
Далее